I've been piling a lot of junk boards, sensors and electronic things recently and since I have some time, I decided I might try to revive some of these old items to do something (quite) useful !
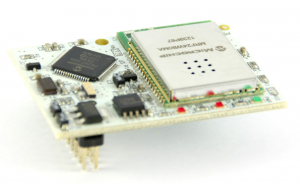
I found this old (first) version of the Flyport Wifi 802.11g board, let's try to do something with it !
For those who don't remember, Flyport Wifi are programmable moduble with integrated WiFi 802.11g connectivity, and a standalone webserver embedded directly onboard. It can creates it own AP, or connect to an infrastructure network.
More info on the OpenPicus site.
I have the "PCB antenna" version, just like this one :
Let's see how we can code on this thing ;)
Setting up the IDE
Oh, my.
The IDE is not really what we could call practical, but it's a the simplest way to compile the code and upload it to the board without too much hassle.
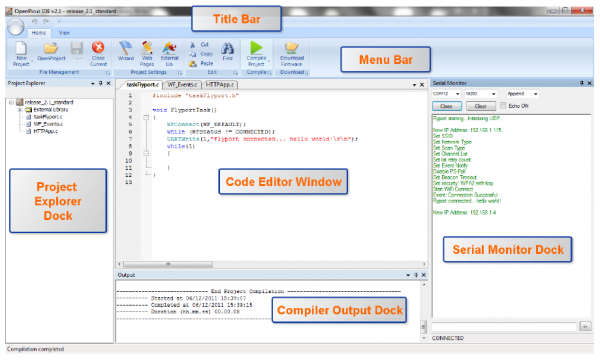
(image from the Flyport wiki)
To get it, you should have a look at http://wiki.openpicus.com/index.php/Getting_Started : the IDE we want for this board is 2.7.1 version, which is the last one compatible with the Flyport modules.
Installation is straight-forward (PC Only !) but you need to install FDTI drivers along the main IDE and the Microchip C30 compiler v3.24 (as indicated on their page). Depending on the cable used (see below), a different driver may be needed, though.
Getting the FTDI cable right
On their site there is no mention of the programming cable one could use to upload the firmware on the board, but they have numerous dev boards that connect via USB.
Unfortunately I don't have any of those so I grabbed a few FTDI cables and tried my luck on the pins.
Turns out it's pretty easy, I grabbed a 5V USB to Serial-TTL UART (the one I have has a Silabs CP2102 USB to Serial UART bridge IC for info) from 4D Systems.
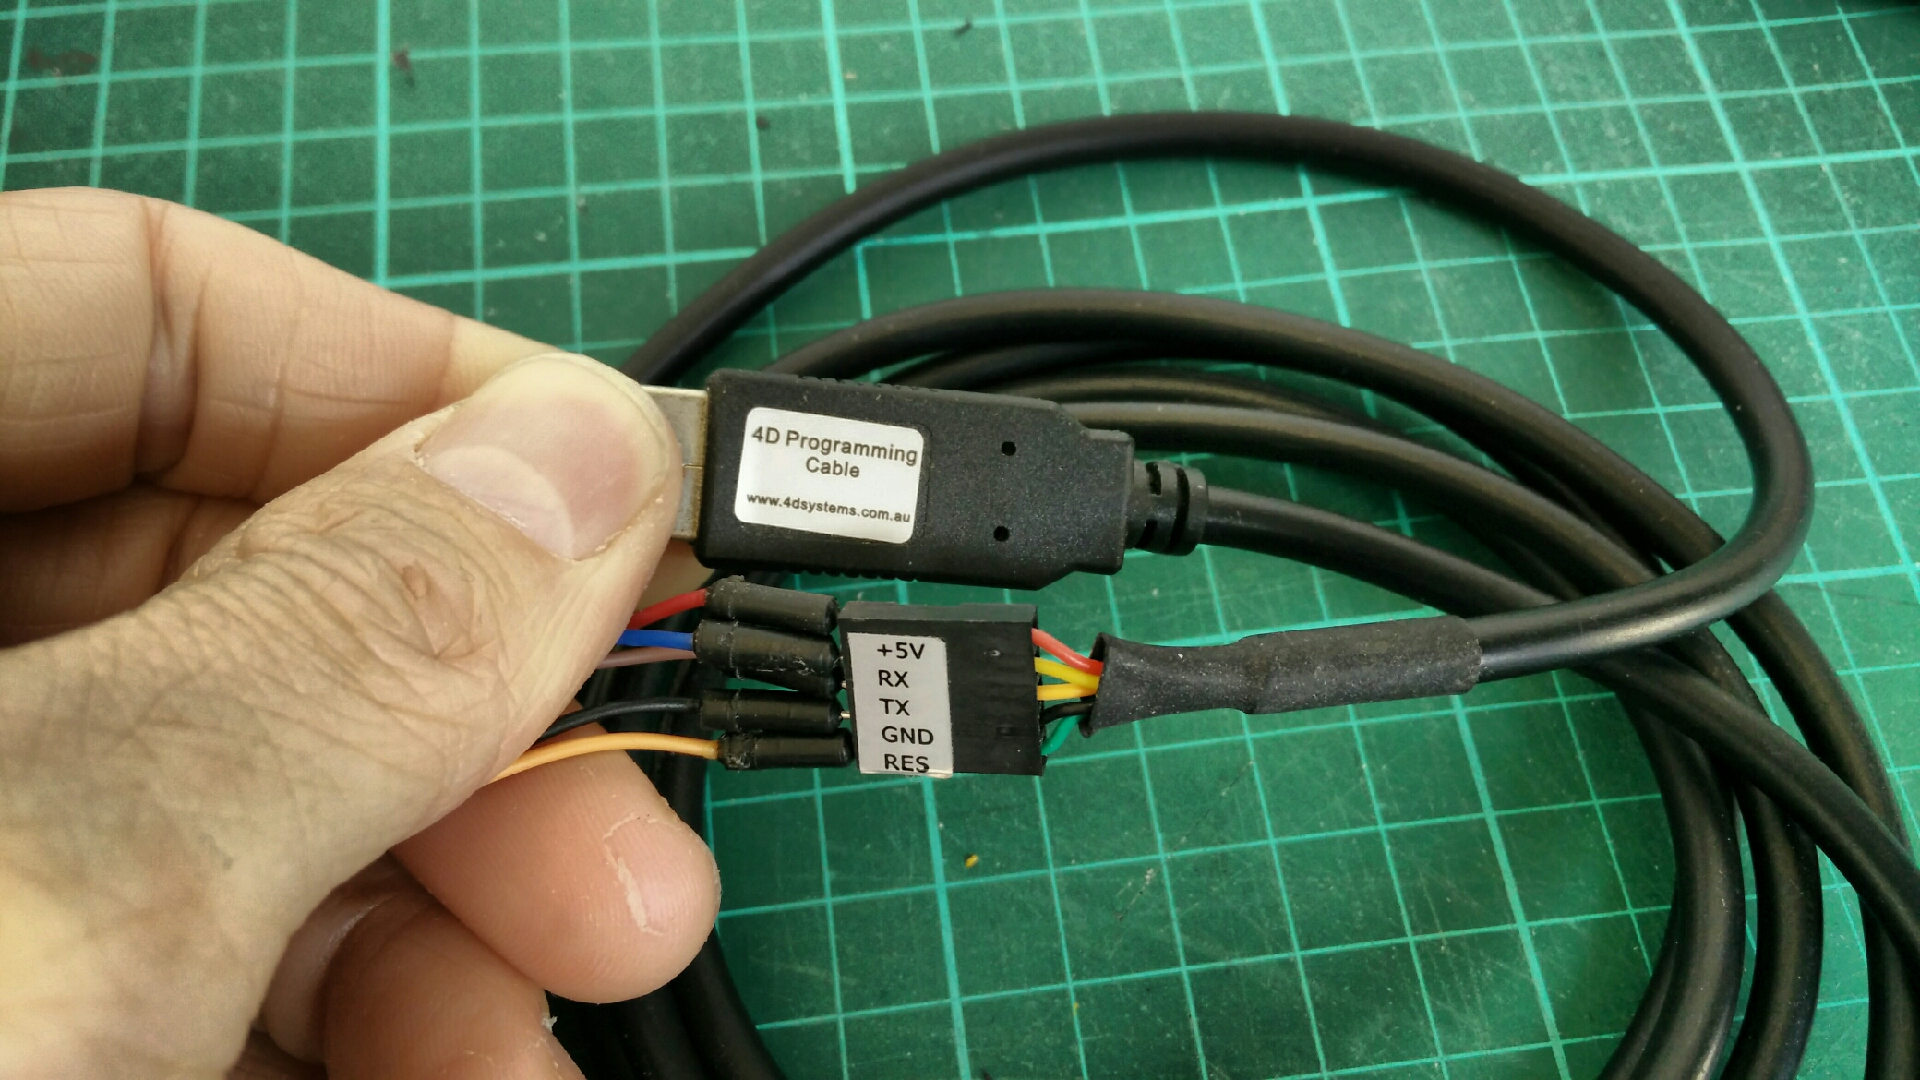
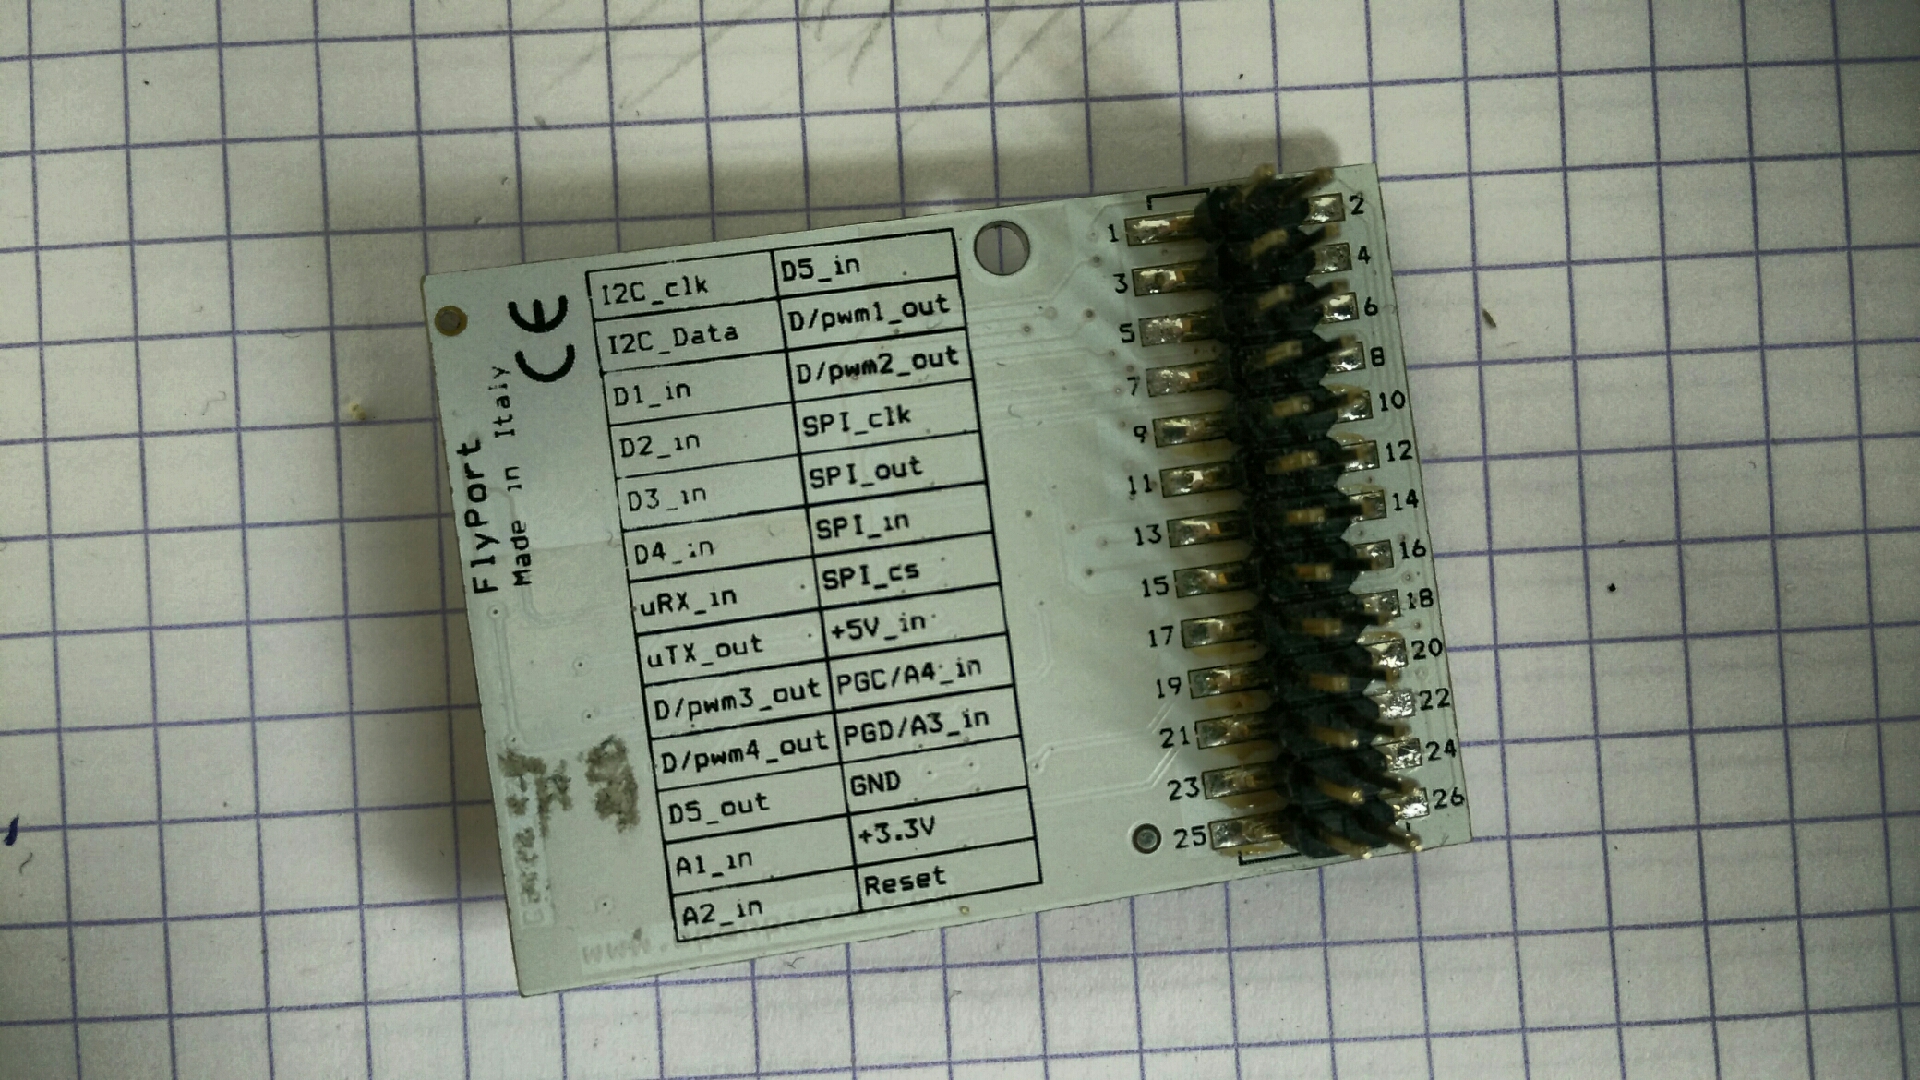
Pins 26 is RESET, 16 is 5V and 22 for GND, and pins 13/15 are for TX/RX. As per the documentation, all pins are 5V tolerant, and moreover I never managed to make it connect with a 3V3 TTL cable...
Note to self : It's a shame there's only one single ground pin on the board but well.
To test the whole thing, I opened up the Flyport IDE and looked in the Serial console to see if I could connect :
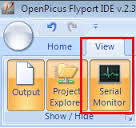
With a baudrate of 19200, it apparently managed to connect, good !
Now onto some useful code !
So, let's do something really useful : a toilet indicator. We have too toilets at my work and we wanted to know when they were free or busy.
I figured I'd add a simple switch to each door mechanism to get the status of the door (locked / unlocked), and I only missed the little WiFi board to communicate the status over WiFi to some server of ours, so this board is definitely perfect for that.
Hardware
Well we only need two buttons connected via a pullup input and the ground, I guess, so that's not going to be difficult to find.
Structure
As for the code, we'll have to :
- connect to our WiFi and get an IP
- Periodically check the button states
- If the state changes, make a GET request to some server
So a very simple application all in all.
Template
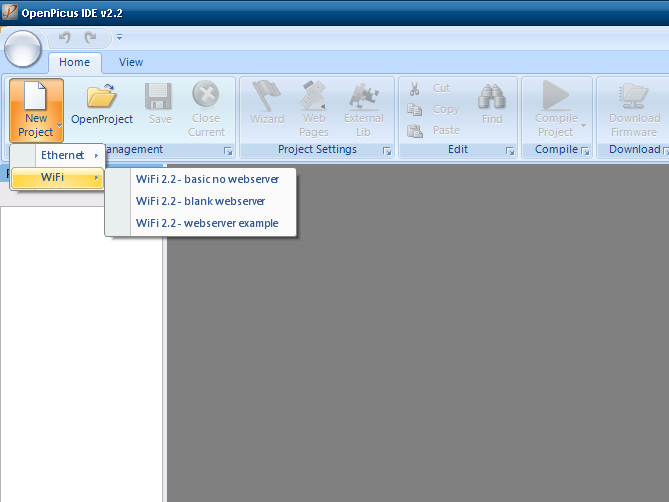
All the code must be in a single file (taskFlyport.c) and its header file ; you cannot create multiple file applications except with importing external libs.
In the IDE, you have the choice to create a template for each board, that creates the folder structure for you and some sample code.
For this board, it's "basic no webserver", since we only want to make a request to a distant server
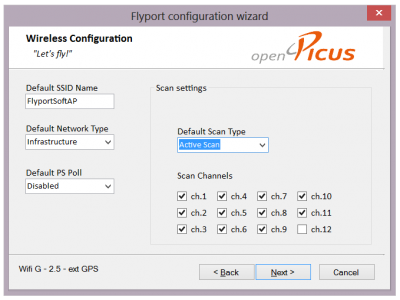
When you start the template assistant, it asks you for a lot of things, but what matters the most is the WiFi configuration that you must put in "Infrastructure" mode and input your SSID and password so that the board can connect.
First we create (in taskFlyport.c) a wrapper function to make the GET request with the headers and data :
// HTTP Socket
TCP_SOCKET SocketTCPClient;
char host[] = "myhost.com";
char port[] = "80";
char path[] = "/public/toilets";
char url[100];
char buf[200];

int cnt = 0;
BOOL flagErr = FALSE;

void sendData()
{
	SocketTCPClient = TCPClientOpen(host, port);

	cnt = 0;
	flagErr = FALSE;

	// Timeout function
	while(!TCPisConn(SocketTCPClient)) {
		if (cnt==1000) {
			flagErr = TRUE;
			break;
		}
		vTaskDelay(50);
		cnt++;
	}

	if(flagErr) {
		UARTWrite(1, "\r\nTimeout error...\r\n");
	} else {
		vTaskDelay(100);
		UARTWrite(1, "Sending data ... ");

		sprintf(url, "http://%s:%s%s", host, port, path);
		sprintf(buf, "GET %s?women=%d&men=%d HTTP/1.0\r\n\r\n", url, WomenRestroomStatus?1:2, MenRestroomStatus?1:2);
		TCPWrite(SocketTCPClient, buf, strlen(buf));
		TCPClientClose(SocketTCPClient);

		UARTWrite(1, " ... Done...\r\n");
	}
}
Then, in the main loop, we check the state via the IOGet() function (IOButtonState() seems more adequate, but in fact, it's not detecting changes all the time, so I went the lowlevel route with IOGet) :
#include "taskFlyport.h"

// True = available
BOOL WomenRestroomStatus = TRUE;
BOOL MenRestroomStatus = TRUE;
BOOL previous_WomenRestroomStatus = TRUE;
BOOL previous_MenRestroomStatus = TRUE;

// Pins
int WomenPin = d1in;
int MenPin = d2in;

UINT16 cnt_main = 0;
UINT16 TASK_DELAY = 5; // 1 = 1/100 s

void FlyportTask()
{
	// Flyport connects to default network
	WFConnect(WF_DEFAULT);
	while(WFGetStat() != CONNECTED);

	// We are connected !
	vTaskDelay(25);
	UARTWrite(1,"Toilets are connected.\r\n");

	// Init pins
	IOInit(WomenPin, in);
	IOInit(WomenPin,inup);

	IOInit(MenPin, in);
	IOInit(MenPin,inup);

	if(IOGet(WomenPin) == 0) {
		WomenRestroomStatus = FALSE;
	} else {
		WomenRestroomStatus = TRUE;
	}

	if(IOGet(MenPin) == 0) {
		MenRestroomStatus = FALSE;
	} else {
		MenRestroomStatus = TRUE;
	}

	sendData();

	while(1)
	{
		//	Toilet loop
		if(IOGet(WomenPin) == 0) {
			WomenRestroomStatus = FALSE;
		} else {
			WomenRestroomStatus = TRUE;
		}

		if(IOGet(MenPin) == 0) {
			MenRestroomStatus = FALSE;
		} else {
			MenRestroomStatus = TRUE;
		}


		// Have values changed ?
		if (WomenRestroomStatus != previous_WomenRestroomStatus ||
			MenRestroomStatus != previous_MenRestroomStatus)  {

			UARTWrite(1,"Status has changed.\r\n");
			sendData();
		}

		// Should we send the values every once in a while just to be sure ?
		if (cnt_main * TASK_DELAY > 6000) { // Every minute

			UARTWrite(1,"Sending values periodically.\r\n");
			sendData();
			cnt_main = 0;
		}

		previous_WomenRestroomStatus = WomenRestroomStatus;
		previous_MenRestroomStatus = MenRestroomStatus;
		vTaskDelay(TASK_DELAY);
		cnt_main++;
	}
}
When a switch has changed state, we send the full state to the server.
In case the state hasn't been sent in a few loops, we send it also, just to avoid missing a switch state change.
The casing
As usual I did a little casing for the whole thing, something little and that would hold the board while allowing for some air to pass through, and the cables too.
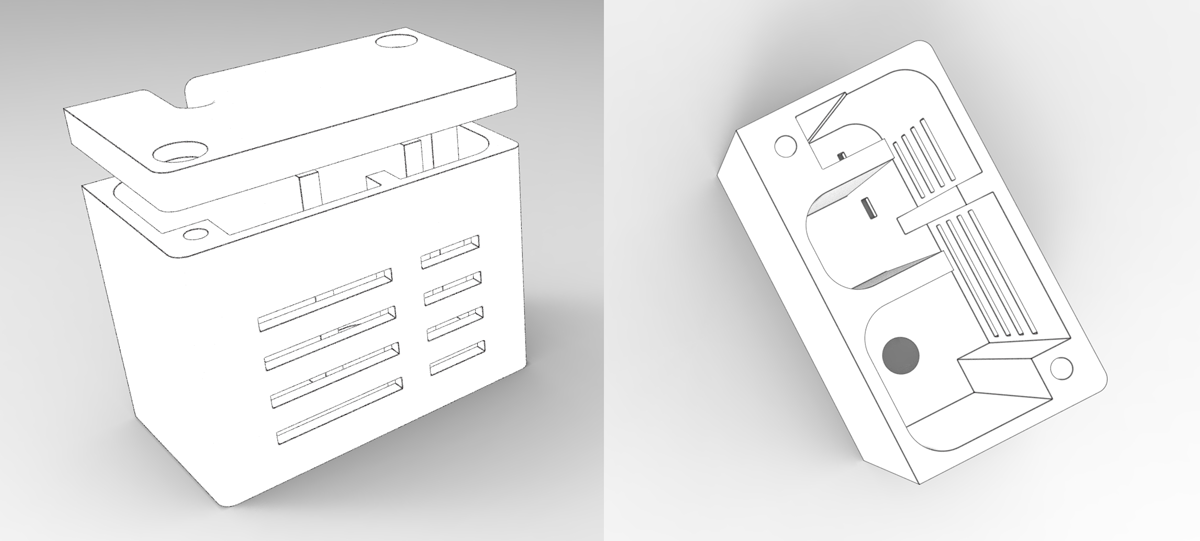
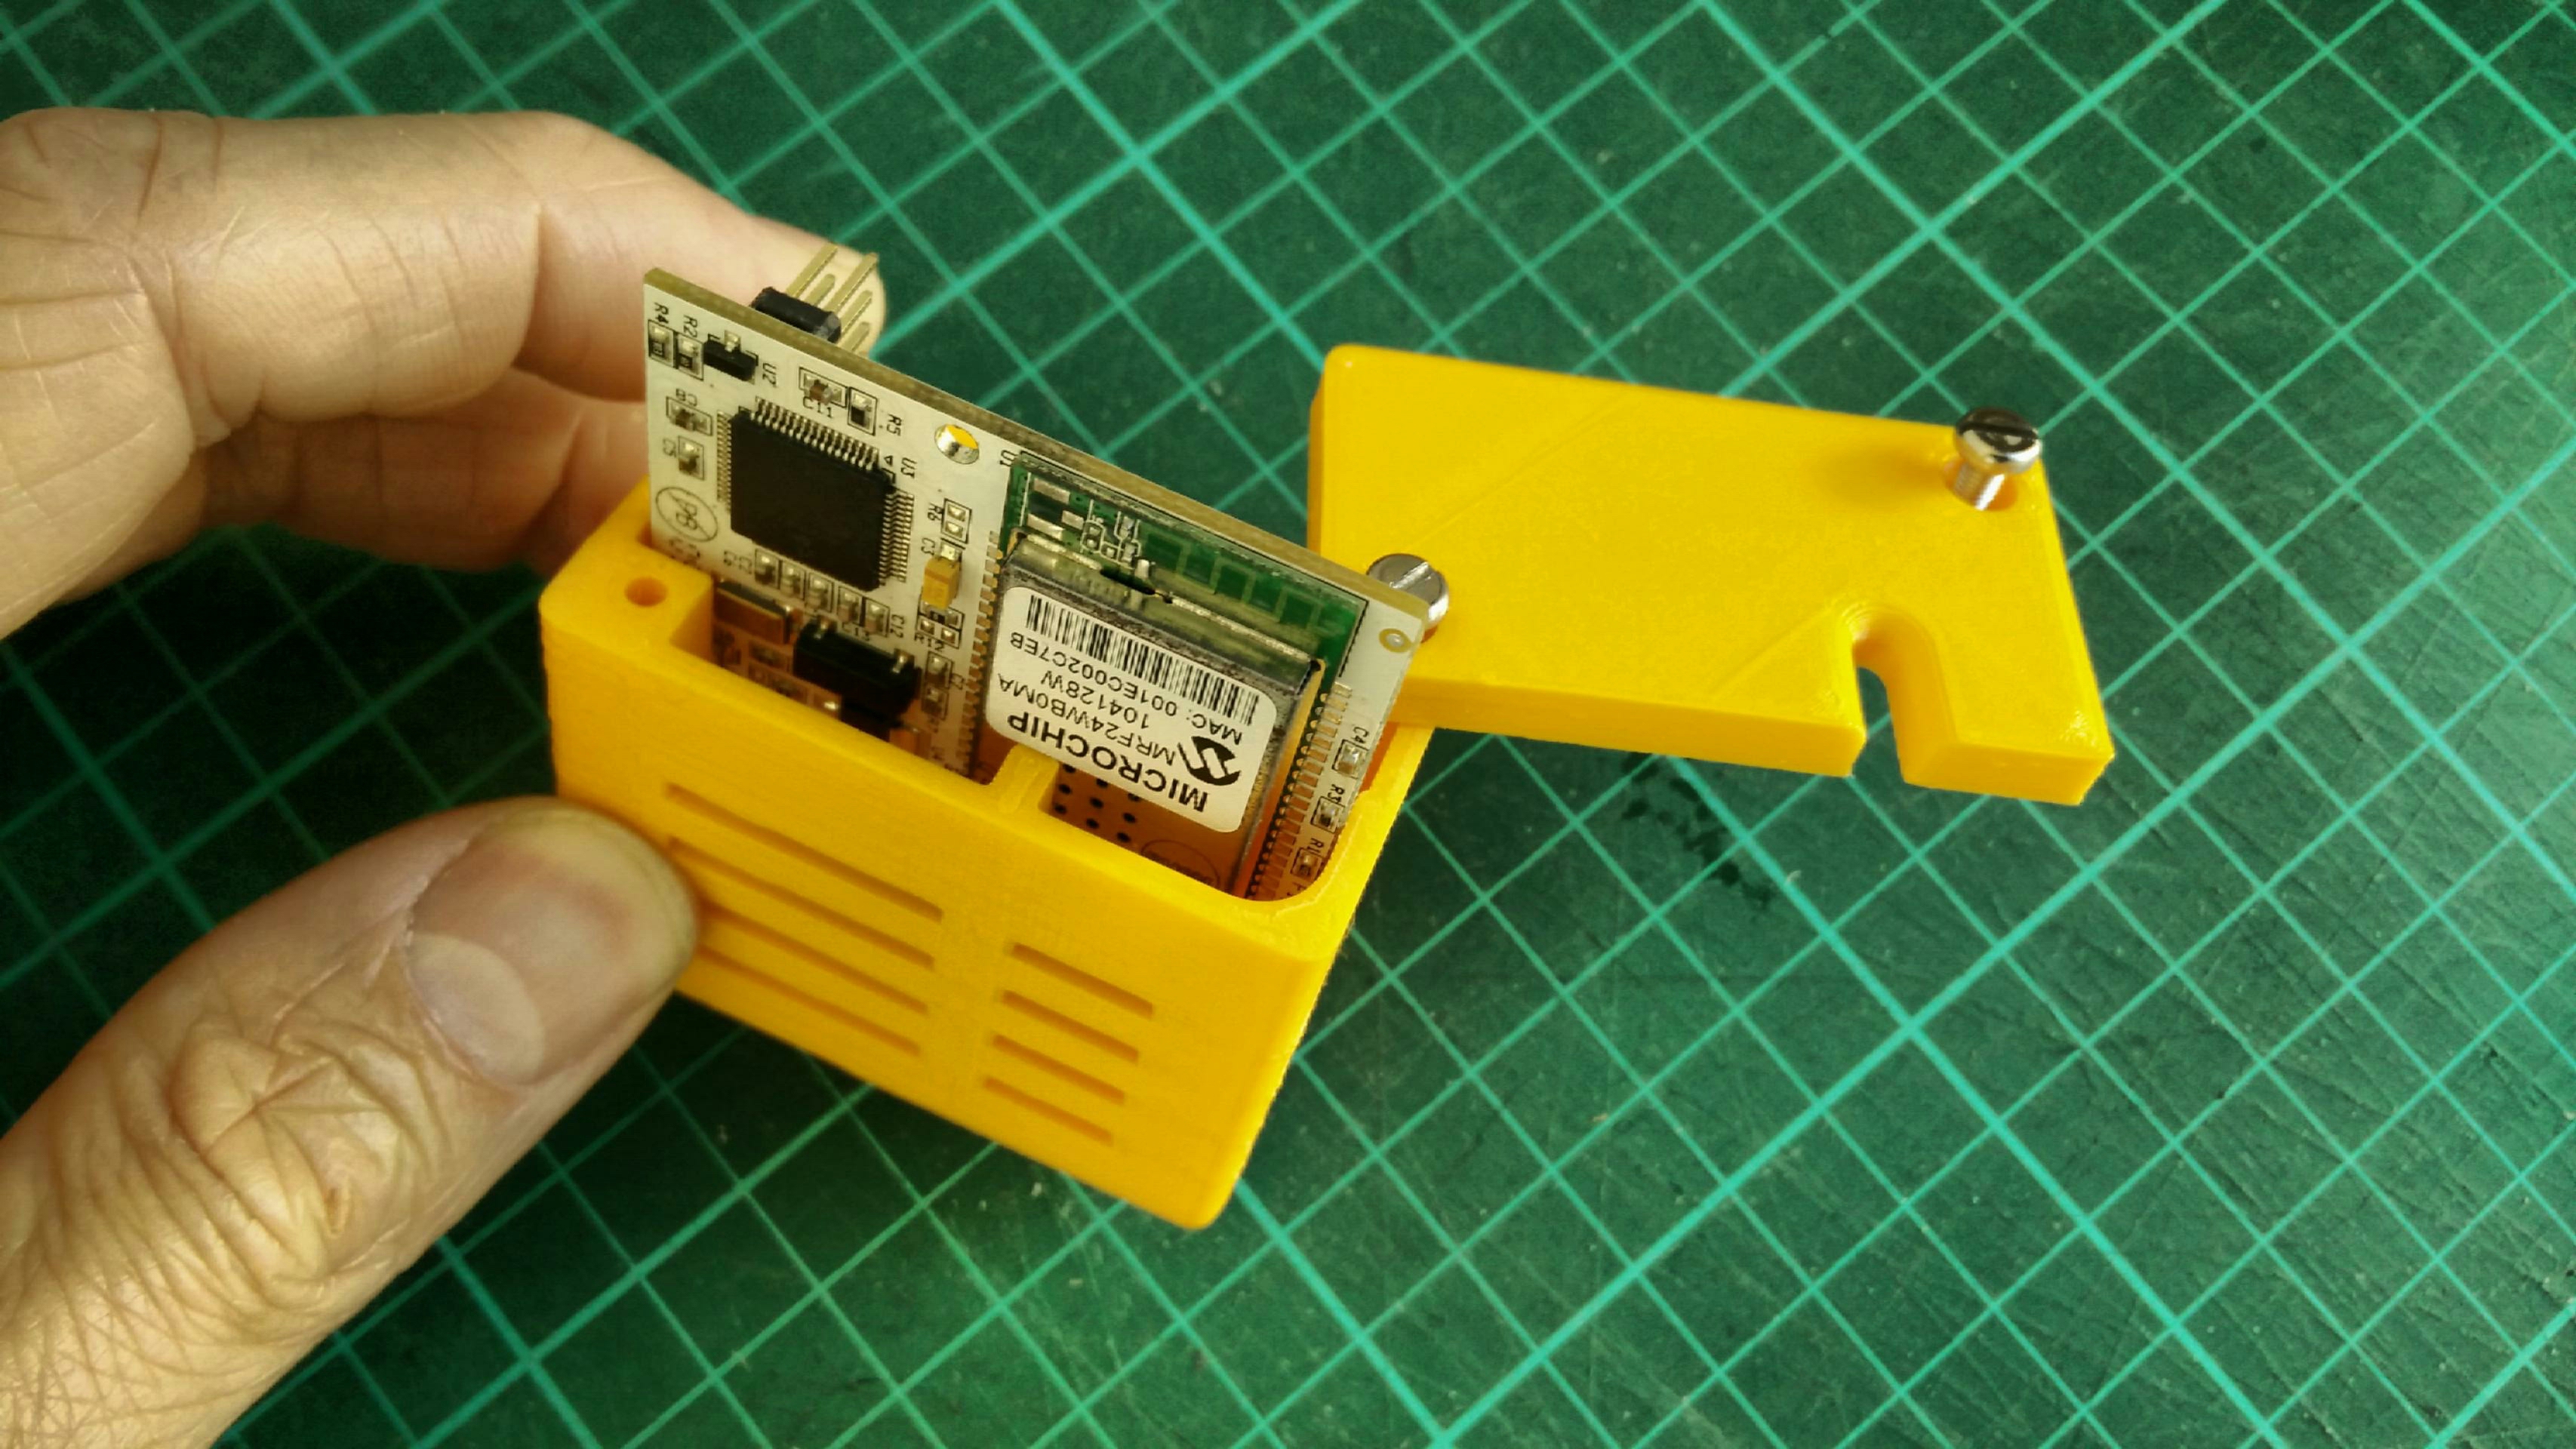
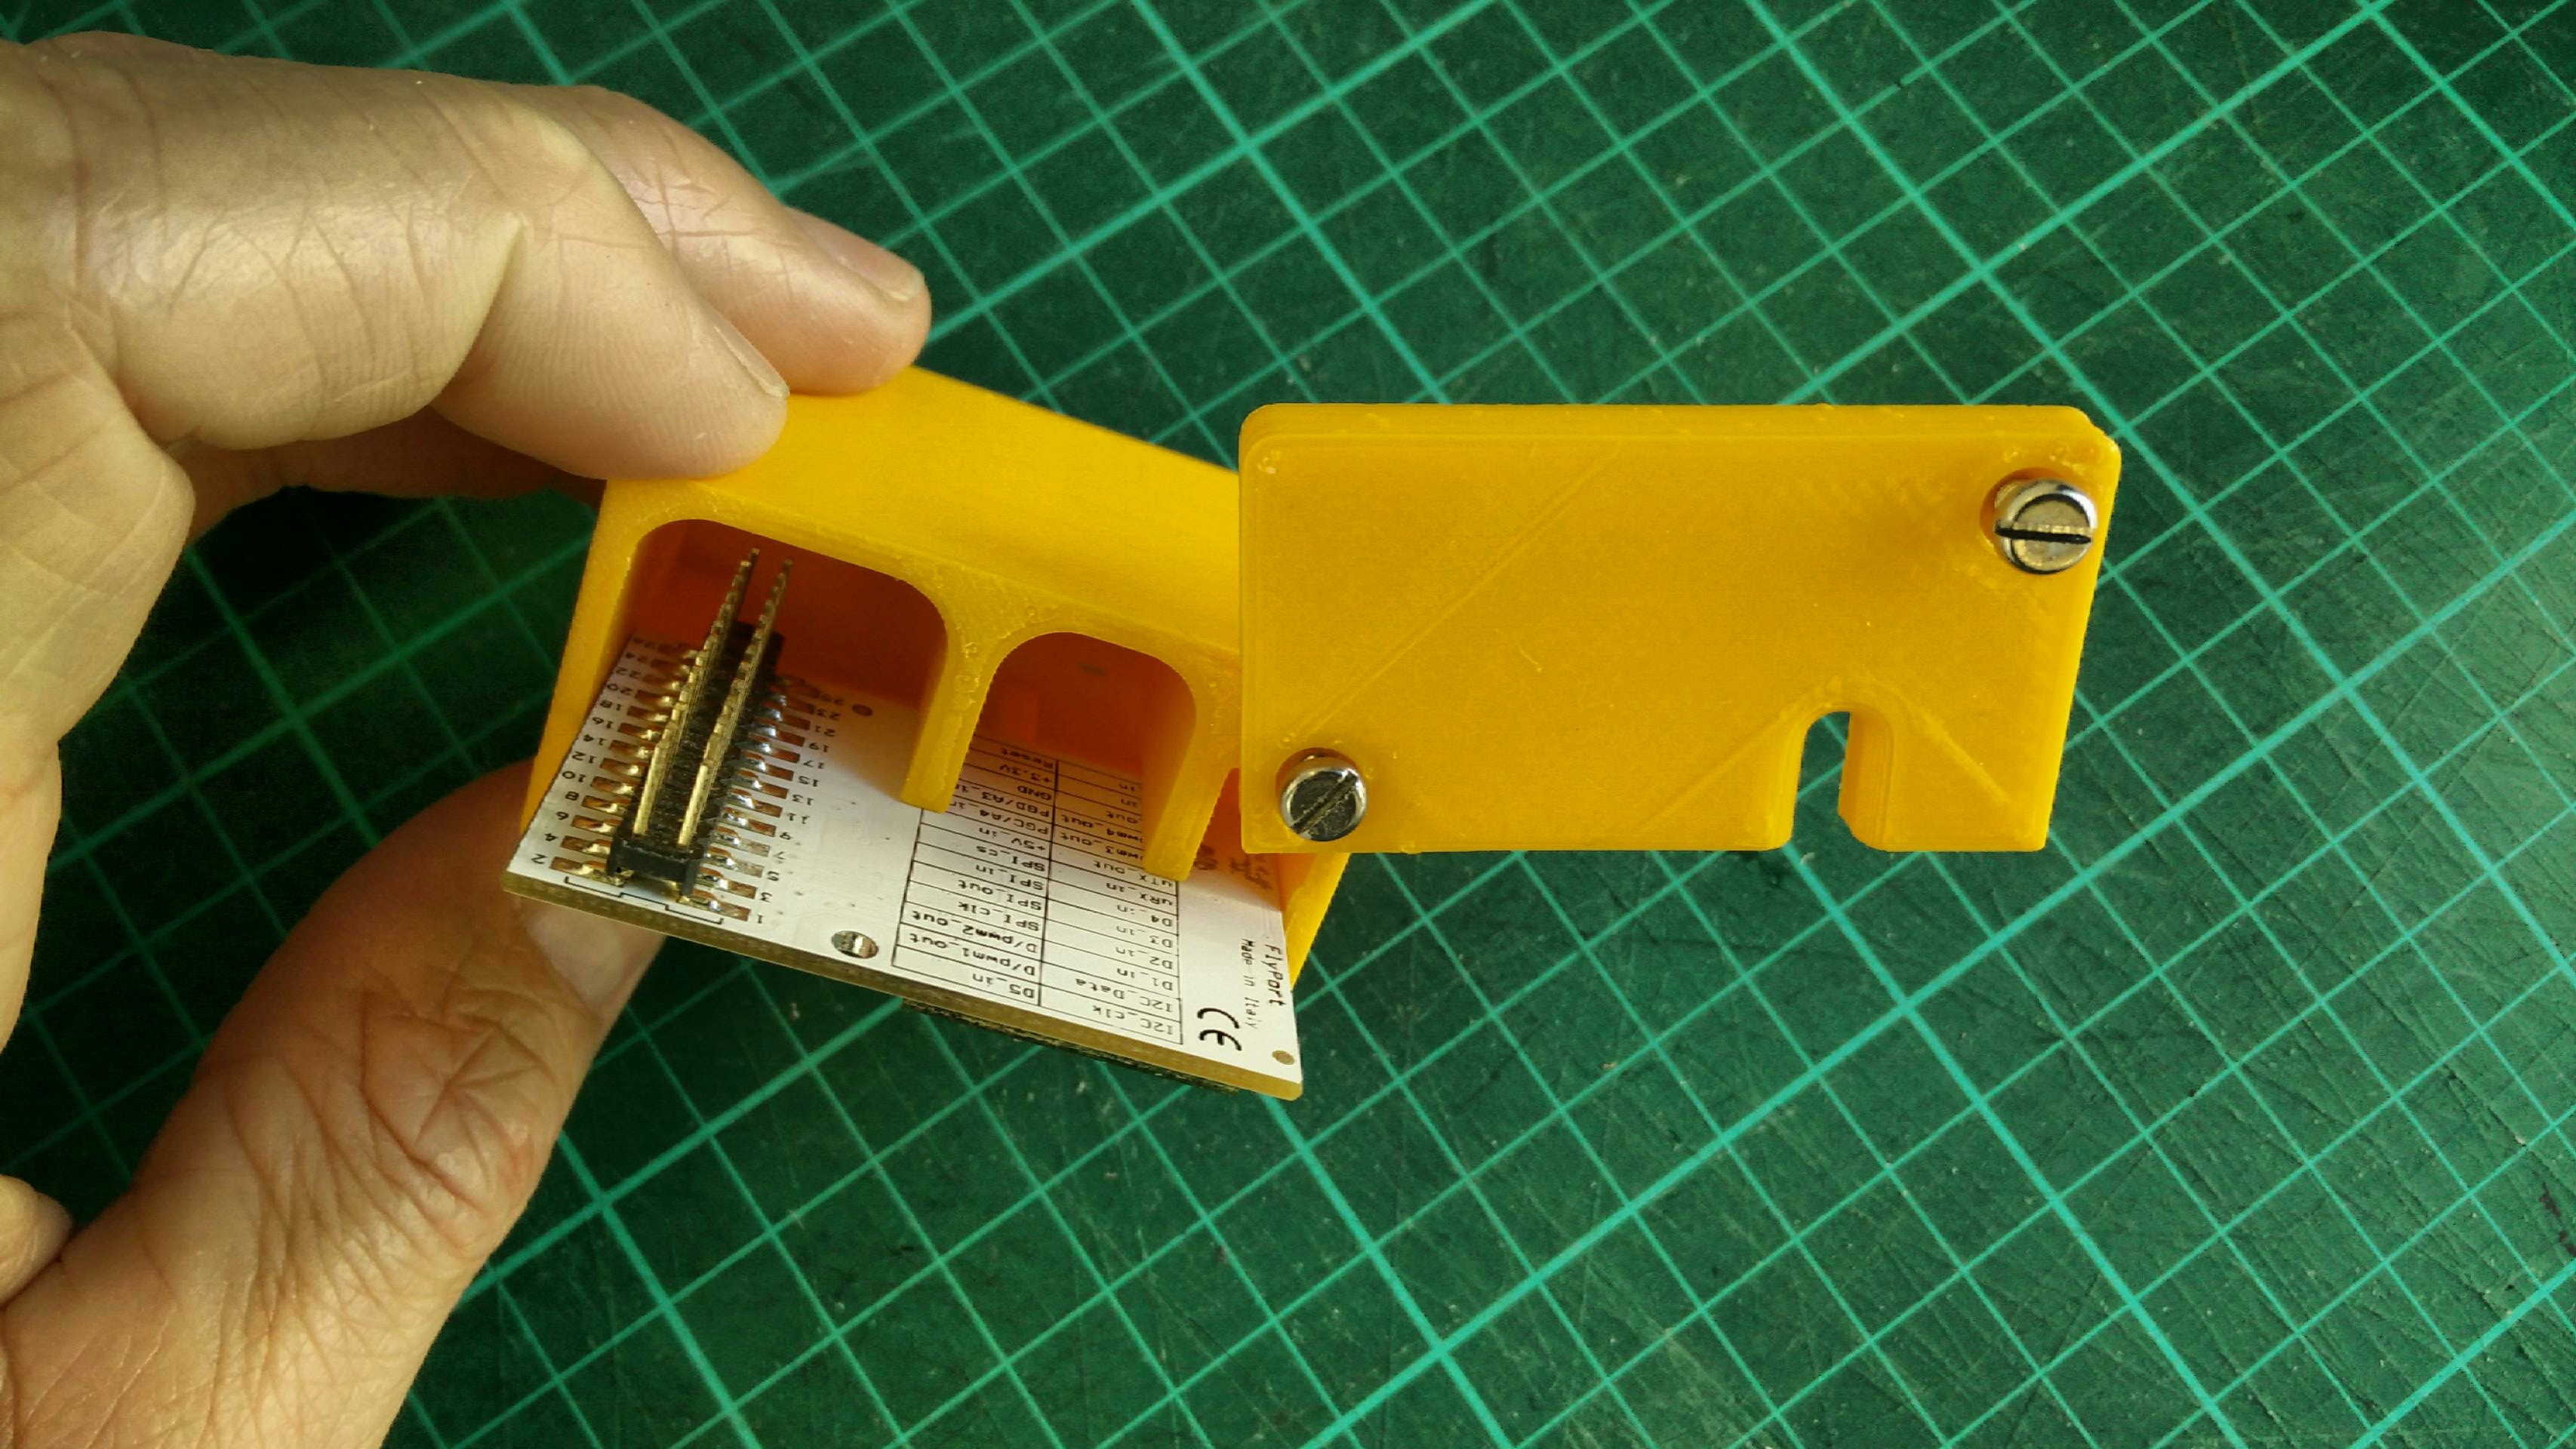
The end result is a nice tiny box that can be stuck with tape on the side of the toilet doors easily ! Great ! Another recycled piece of hardware that won't be uselessly lying in my workshop.