We love Adafruit.
We love their products, libraries, their tools, ... well basically everything they do and share to the public.
I've been using their Adafruit GFX library for a while now with every kind of display available on their shop : from the low-power Sharp to the SPI-enabled color TFTs, and some led matrix panels too ...
The provided fonts are easy to use and provide a wide range of possibilities, but if you want to design specific screens, you clearly want to use your own font.
For a recent project, I needed to use Roboto Thin and Roboto Light but I ran into some problems when converting the fonts.
Converting a font for use with the lib
It's pretty much explained in the /fontconvert part of the library repository here, but let me break it out again.
You need a C compiler, the TTF file or your font and a text editor to proceed.
First, set the dpi of the font in the file first. This is important since it dictates what the size of the font is really compared to the dot size of the screen.
It's in the fontconvert.c file, line 27 :
...
#include "../gfxfont.h" // Adafruit_GFX font structures

#define DPI 141 // Approximate res. of Adafruit 2.8" TFT

// Accumulate bits for output, with periodic hexadecimal byte write
void enbit(uint8_t value) {
...
It's the #define DPI 141 that you want to change. To calculate yours, it's quite simple. For instance, for the Sharp display, we have the following info
- resolution is 168x144 pixels (height x width)
- width is 1.3''
So we will have (we'll use the width since pixels are square) :
DPI = 144 / 1.3 = 110.7 ≃ 111
So you just use
#define DPI 111
Now you can build the tool thanks to its makefile :
cd fontconvert
make
Now you can use the fontconvert tool like this
./fontconvert RobotoThin.ttf 12 > RotoboThin_Fixed12pt7b.h
Customizing / repairing the output
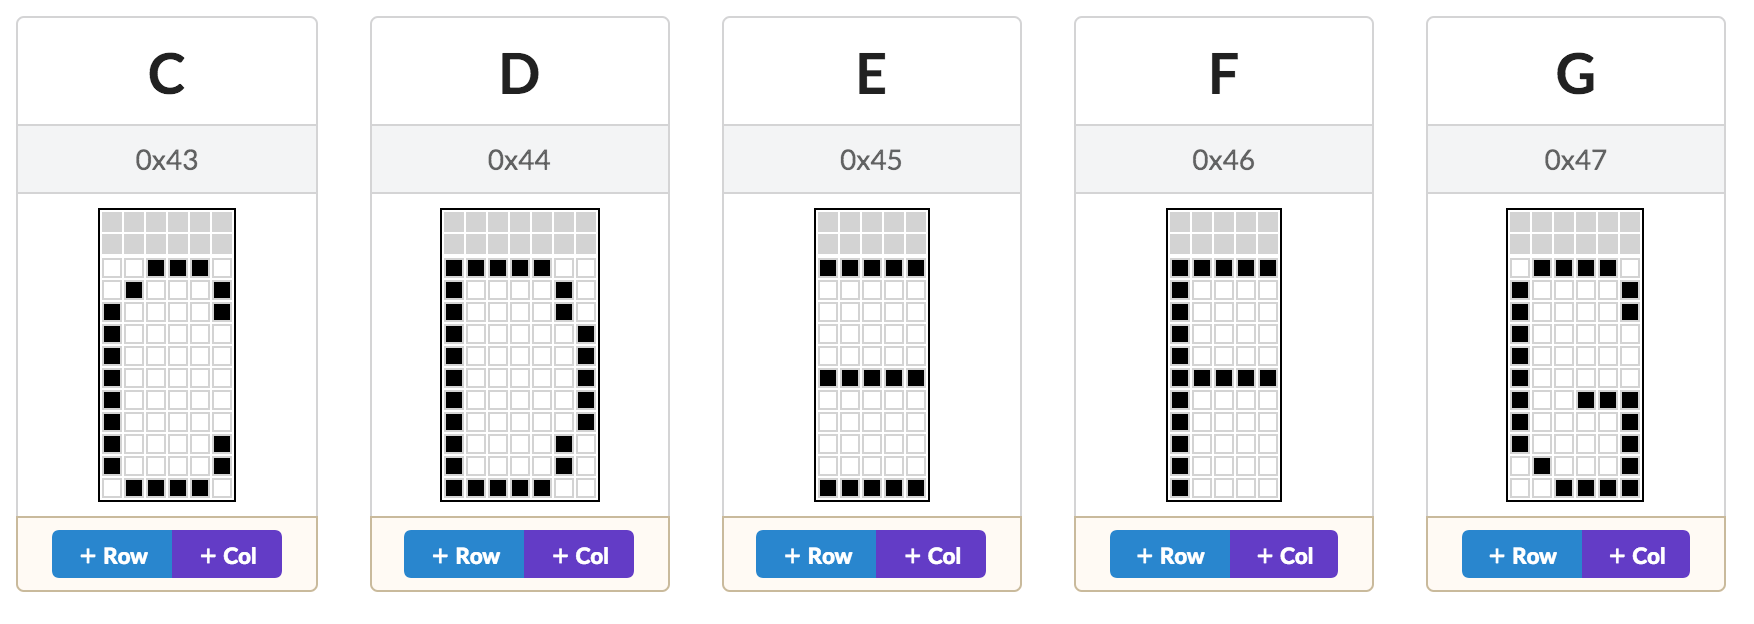
But sometimes, the created file is not "pixel perfect" in the sense that some pixels are obviously missing.
For example, for the RobotoThin variant in 7pt for a DPI of 141, I get a half-baked p and E :

This is likely due to freetype making (bad) choices on how to approximate sub-pixels, but we end up with a font that's not usable.
The real problem is that the resulting header file is hard to grasp, and hard to modify to add a single missing pixel.
Worry not, though ! :)
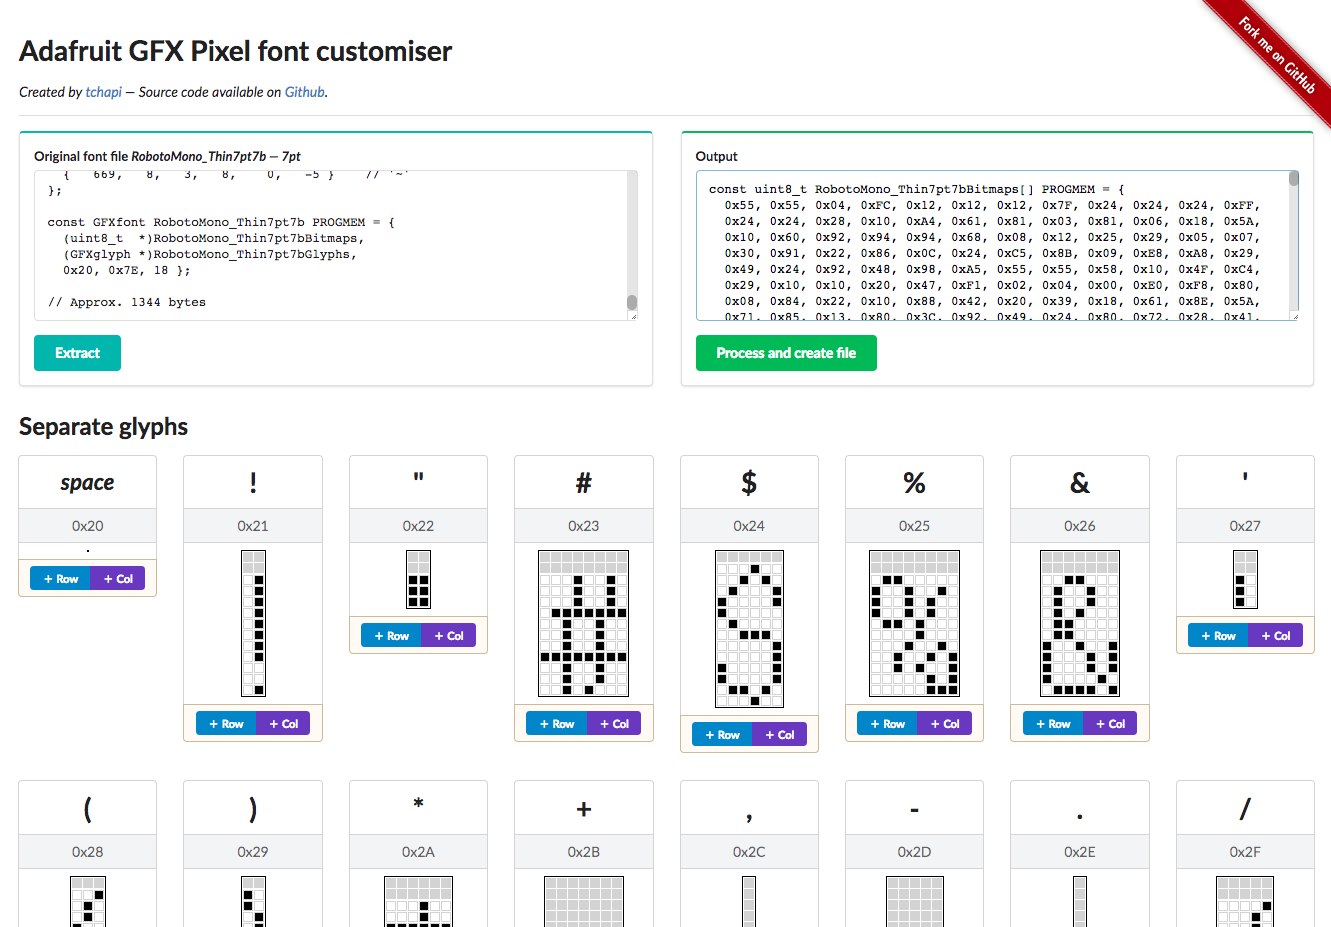
I created a font customiser to do just that : "decompile" the header file, display it in a handy editable format where you can change pixel, add rows or columns for each glyph, and then "compile" it again to a header file.
https://tchapi.github.io/Adafruit-GFX-Font-Customiser/

It's pretty straight forward to operate :
Paste the content of a converted file in the input textarea, and click on Extract. It takes a few seconds as the font is parsed and rendered as glyphs on the page.
When it's done, you can edit each glyph :
- click on a pixel to toggle its state (lit / unlit)
- click the buttons "+Row" or "+Col" to add a column or a row to the glyph. The columns are added on the right and at the bottom
Once you're happy with the result, click Process and you have the resulting font in the output textarea. 🎉
As usual, it's all open-source on Github. The code (a single HTML page with JS) is clearly not perfect and a bit messy, but hey, it does the work. PRs welcome of course.