Olimex is a Bulgarian firm that creates development boards based on various controllers, including Atmel's AVR such as the ATMega 328P (like the Arduino Uno) or the ATTiny85, for instance.
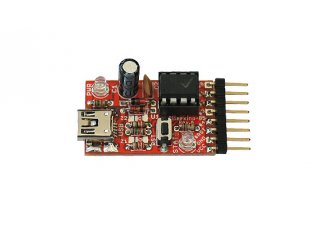
One of these boards is the Olimexino 85, based on the ATTiny85. You can buy it here.

This board comes with a Micronucleus bootloader installed, which is a bit different than the standard Arduino one. The Micronucleus bootloader is pretty small, and is very useful since it can communicate directly with the (modified) Arduino IDE for uploading a new sketch, while a regular Arduino bootloader on the same chip would require an ISP of some kind.
So this board is the perfect companion if you want to make a quick project with few I/Os, simple functionalities, and in a tiny space (the board is about 2cm x 1cm).
Coming from the "Arduino bootloader" world though, it took me a while to get these little gems to upload flawlessly so I thought I'd share the process.
Download the modified IDE
Since the regular Arduino IDE does not have the capability to upload on a micronucleus firmware, we need to use a different IDE. Digistump's IDE does the job. First, download it from the Digistump wiki :

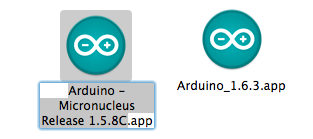
You may notice that the actual version from which it is forked is 1.5.8, which is definitely not the latest (1.6.3 as I write this). That means you're better off not upgrading to a newer version if you don't want any conflicts in the future. I stick to this version without upgrading; and so as not to mess with my actual Arduino IDE, I keep the two :

So I can upgrade the official Arduino IDE and still have a working Digistump version alongside the first one.
NB : They both share the same
~/Arduinofolder for storing the libraries and hardware profiles, which makes it pretty handy
Choose the correct settings
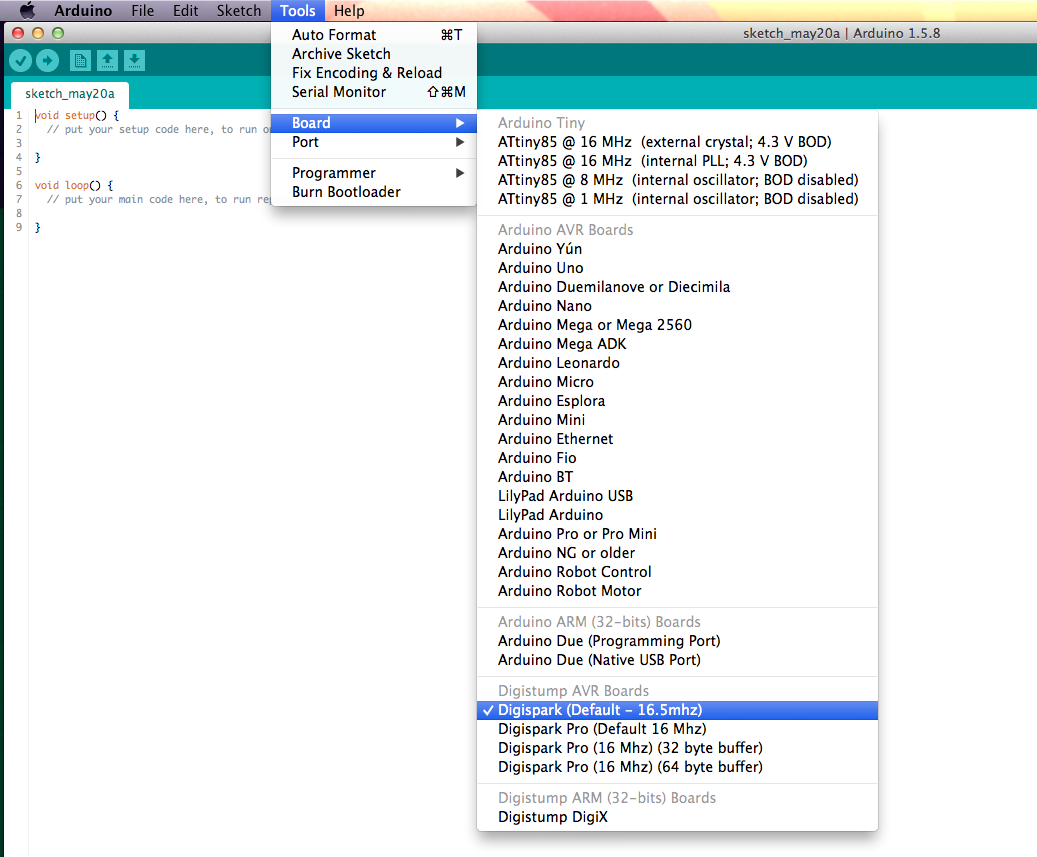
If you're working with an ATTiny85, you should choose Digispark (Default - 16.5MHz) from the list. The ATtiny85 @ ... profiles don't work, they're only for the official Arduino bootloader when uploading with an ISP in between.

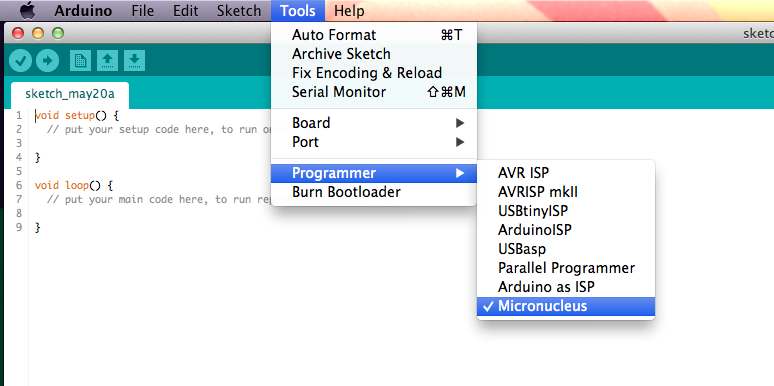
And as for the programmer, choose Micronucleus :

No serial port needed
You might be tempted to say : « My board does not show up in the Port menu when it's plugged in ! What's wrong ? ». Nothing. This is perfectly normal.
When you click upload, the console will output a message asking you to plug the device when asked for it :

You have 60 seconds to do it. In case the device was plugged before hitting that Upload button, you MUST unplug and replug it !
Once plugged in and recognized, the firmware will upload and output the progress in the console, and end with a nice “ Micronucleus done. Thank you! ”.
At this point, your Olimexino 85 is flashed. Yeah !
More info
The Digispark IDE does NOT have a serial monitor functionality and CANNOT burn the bootloader.
Also, some libraries “made for Arduino” are not compatible with the micronucleus bootloader. Hopefully, the few useful ones do, or can be bypassed with pretty easy pieces of code or forked versions. For I2C devices, the TinyWireM library should be used for instance.